In this tutorial I’ll quickly show you how to develop a dApp on Horizen EON. I’ll create an ERC-20 token whose contract embeds its own faucet, TheFaucetCoin, whose symbol will be TFC. In a second step, I’ll create a dApp to claim TFC using Ankr as an RPC service in conjunction with RainbowKit and Wagmi for the high-level API part.
Translated from French by CryptoManion :
https://mescryptos.fr/developper-une-dapp-sur-horizen-eon-the-faucet-coin/
The TFC token
To develop a dApp on Horizen EON we need at least 2 components, a smartcontract and a user application.
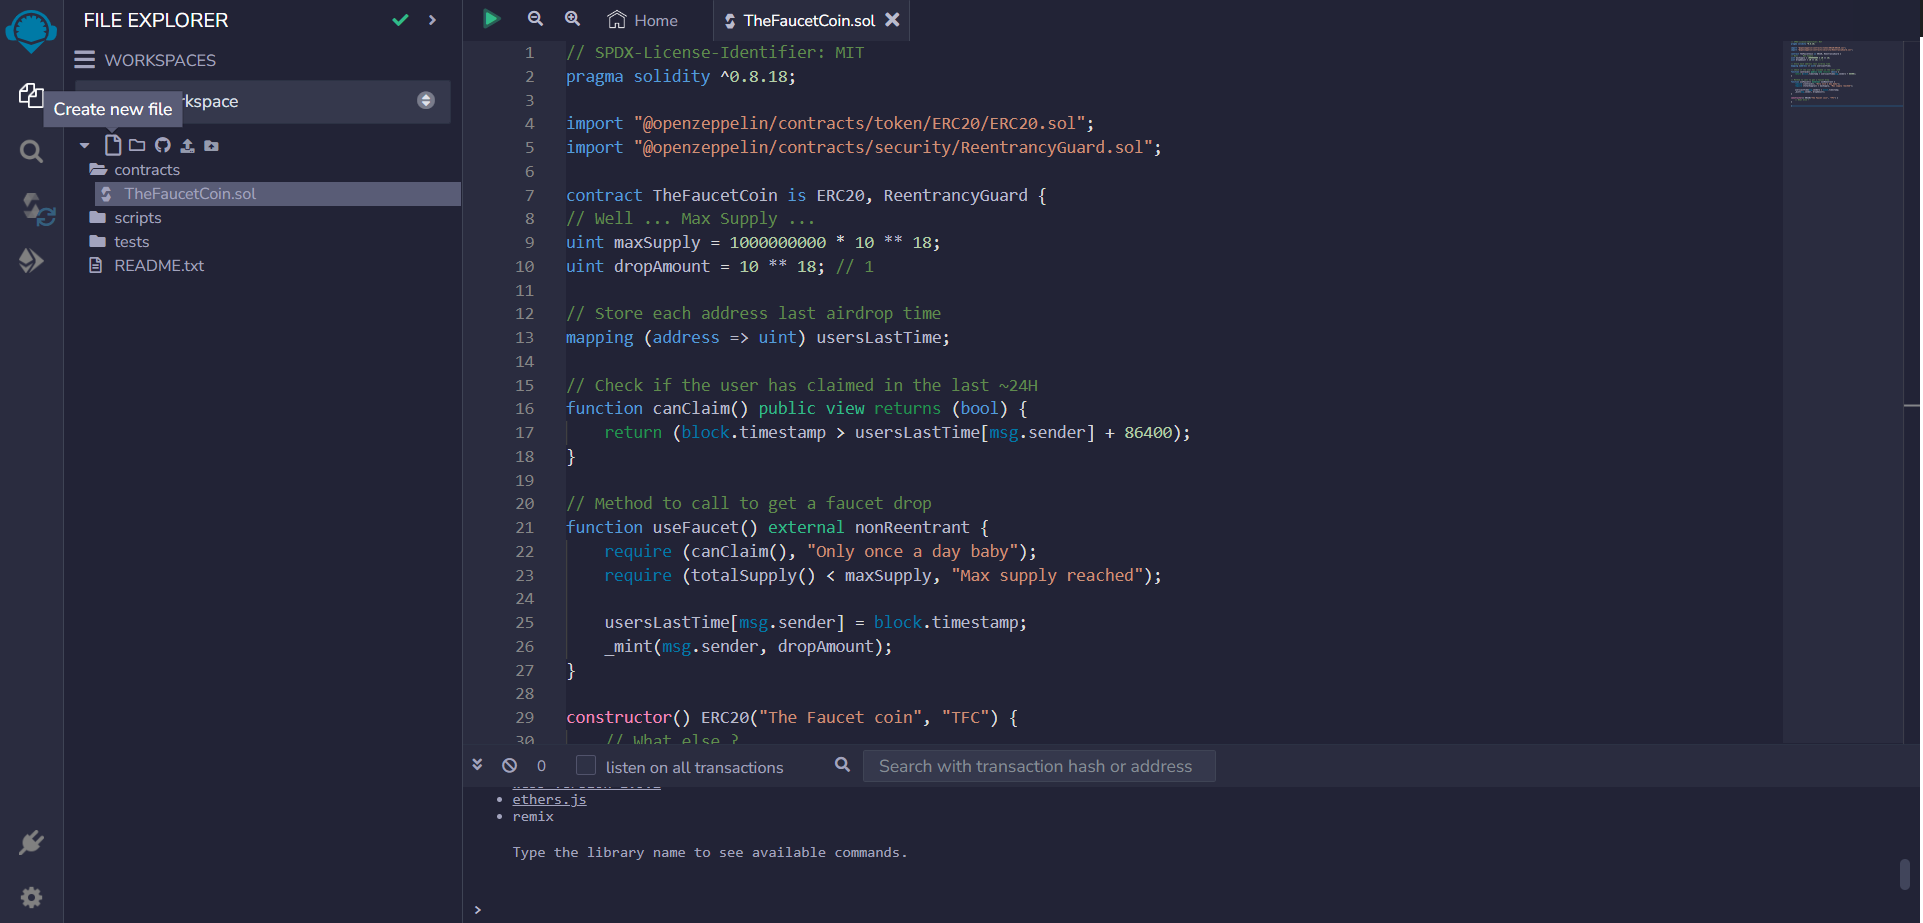
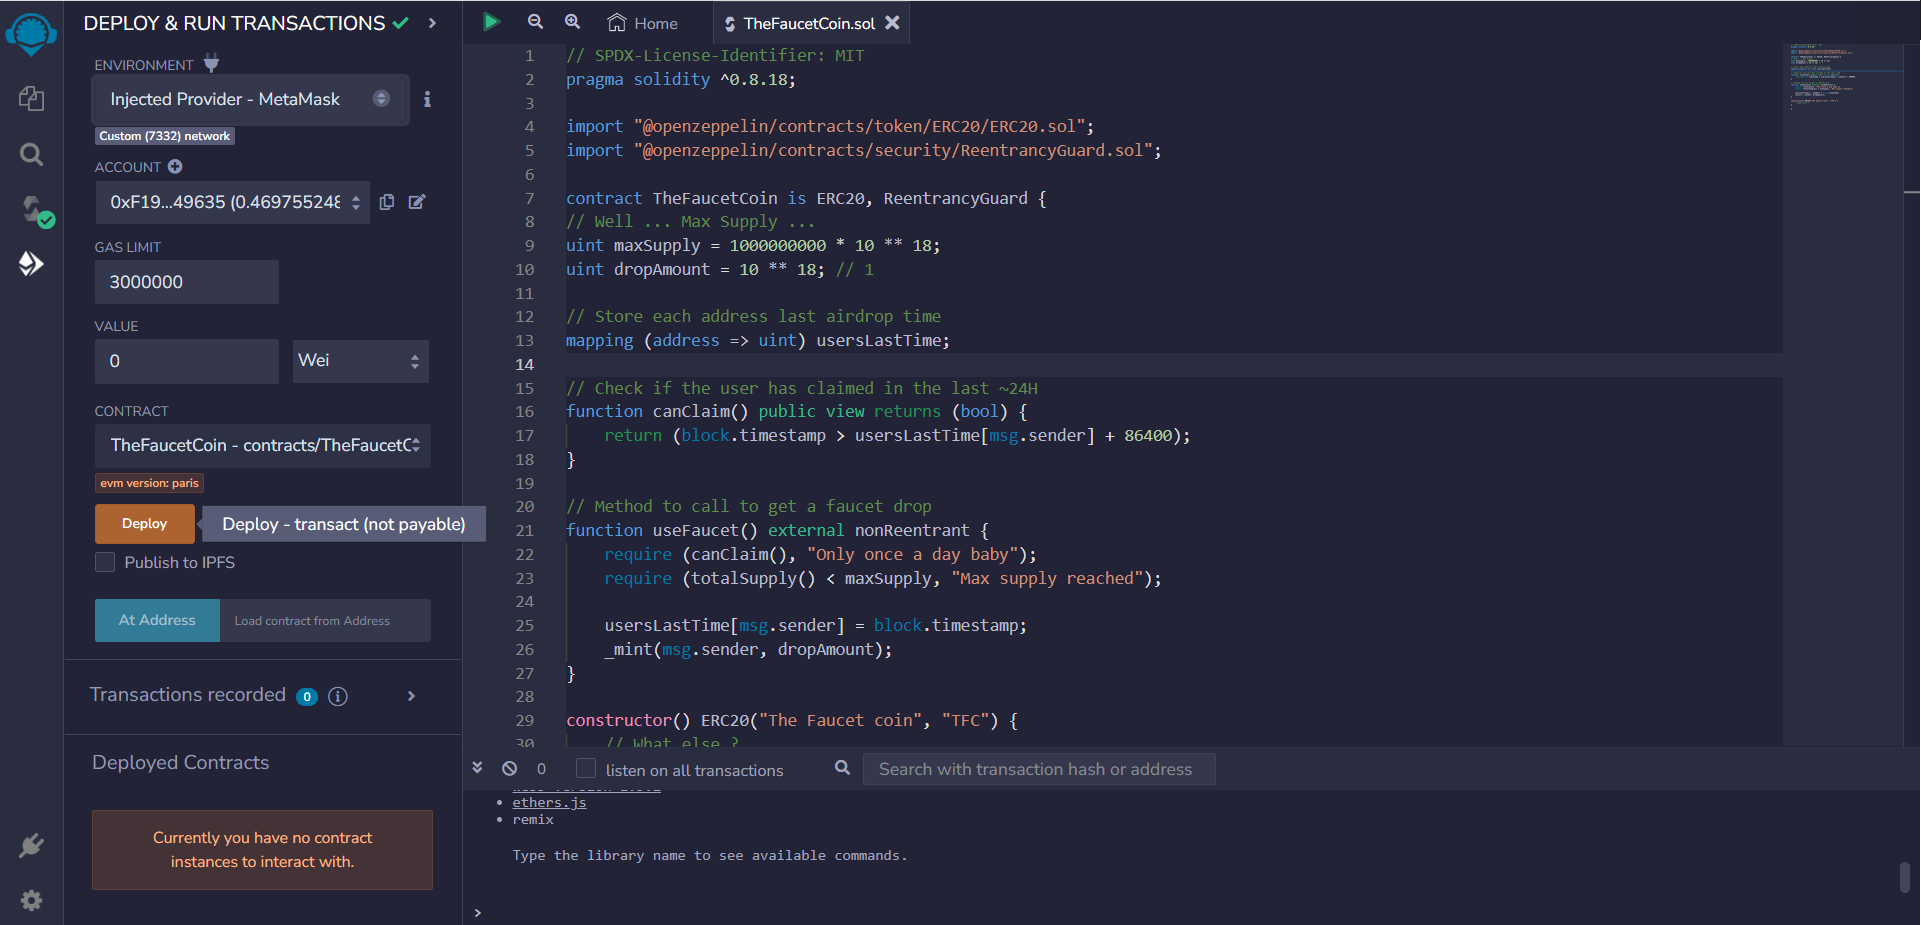
We start directly with the solidity code of the $TFC token smartcontract: The Faucet Coin.
// SPDX-License-Identifier: MIT
pragma solidity ^0.8.18;

import "@openzeppelin/contracts/token/ERC20/ERC20.sol";
import "@openzeppelin/contracts/security/ReentrancyGuard.sol";

contract TheFaucetCoin is ERC20, ReentrancyGuard {
// Well ... Max Supply ...
uint maxSupply = 1000000000 * 10 ** 18;
uint dropAmount = 10 ** 18; // 1

// Store each address last airdrop time
mapping (address => uint) usersLastTime;

// Check if the user has claimed in the last ~24H
function canClaim() public view returns (bool) {
    return (block.timestamp > usersLastTime[msg.sender] + 86400);
}

// Method to call to get a faucet drop
function useFaucet() external nonReentrant {
    require (canClaim(), "Only once a day baby");
    require (totalSupply() < maxSupply, "Max supply reached");

    usersLastTime[msg.sender] = block.timestamp;
    _mint(msg.sender, dropAmount);
}

constructor() ERC20("The Faucet coin", "TFC") {
    // What else ?
}

}
We add 3 variables:
- maxSupply containing the maximum number of tokens that can be created, here 1 billion.
- dropAmount, which holds the number of tokens granted per use of the Faucet, here 1.
- usersLastTime containing the time when the Faucet was last used by an address.
The idea is to distribute 1 TFC to each address using the Faucet, limiting it to one use per day.
The Faucet runs until the maximum total supply of one billion tokens is reached, i.e. about 3 years for one million addresses.
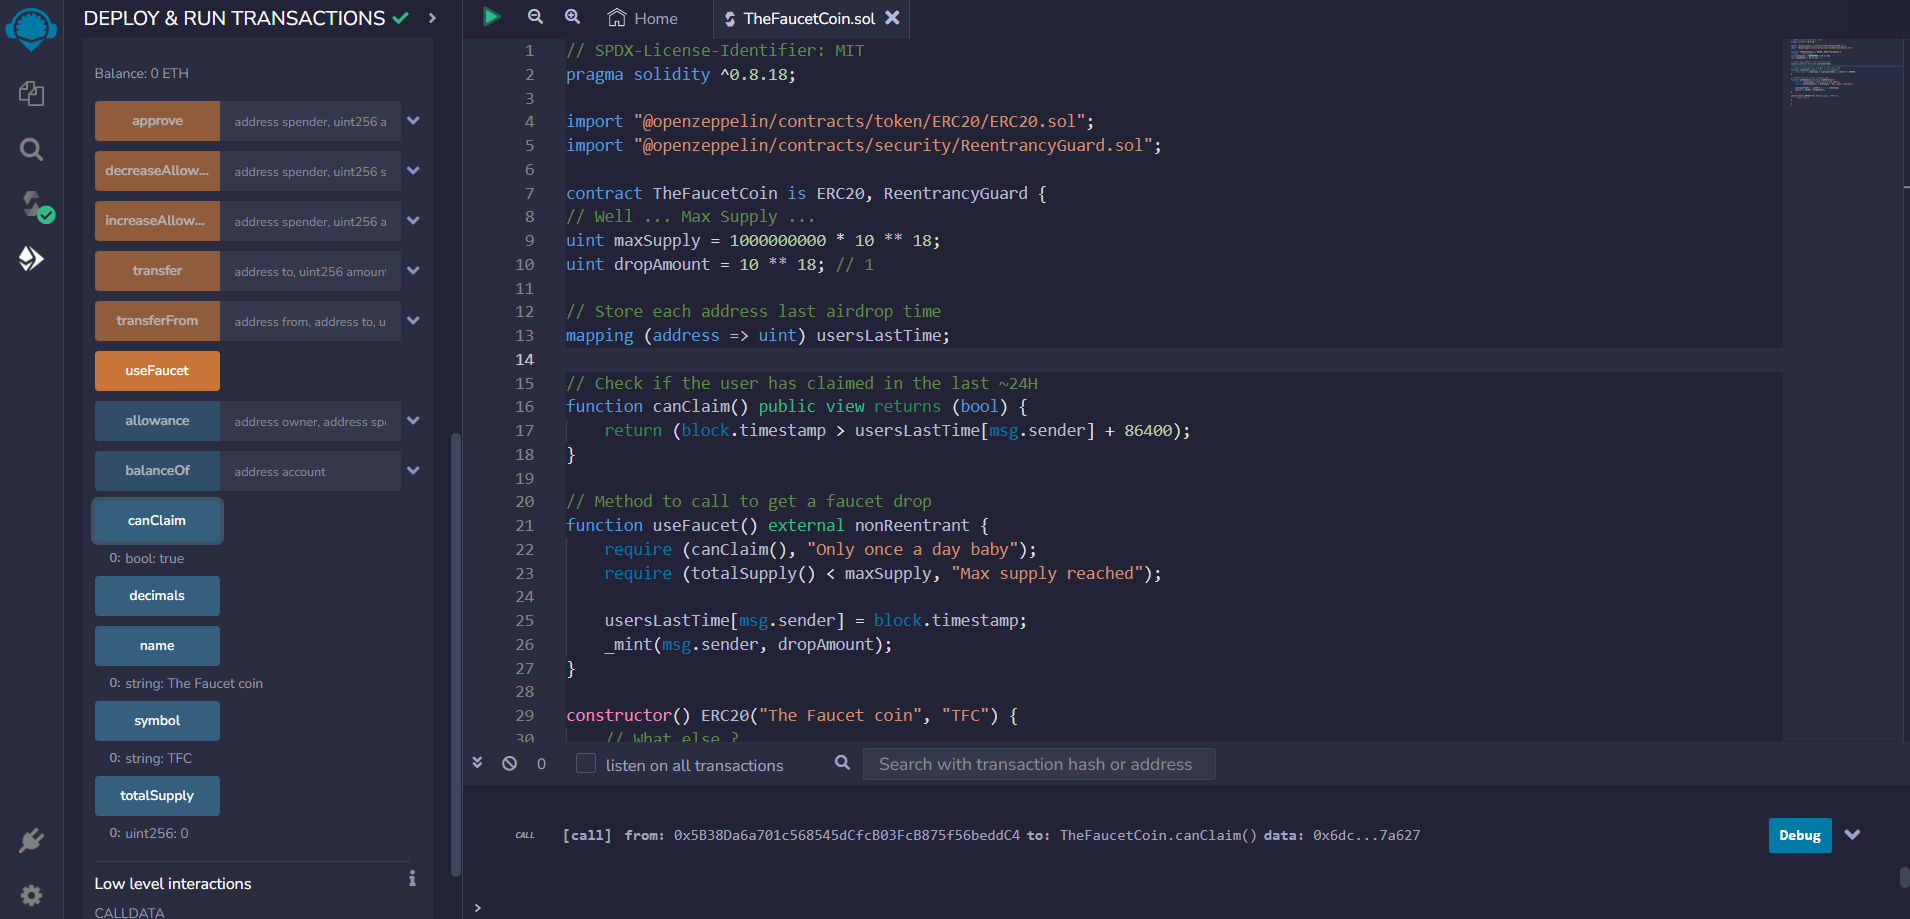
I use a canClaim method to check if an address has the right to use the Faucet.
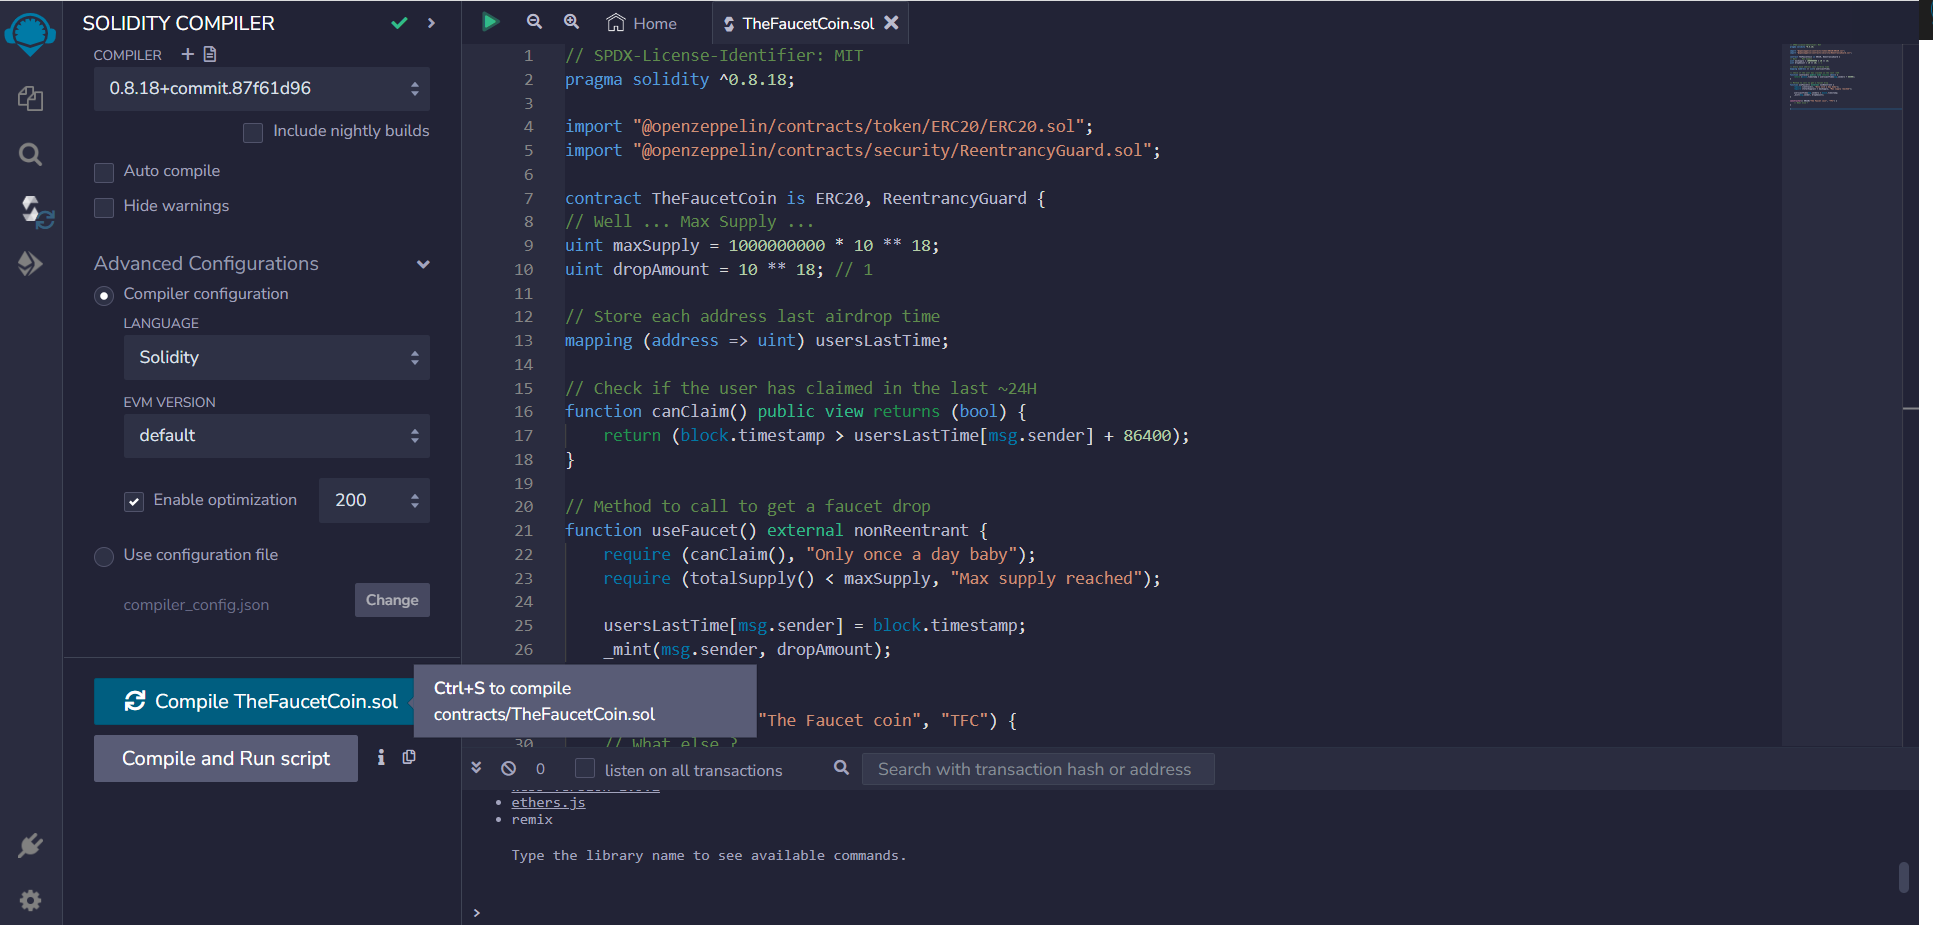
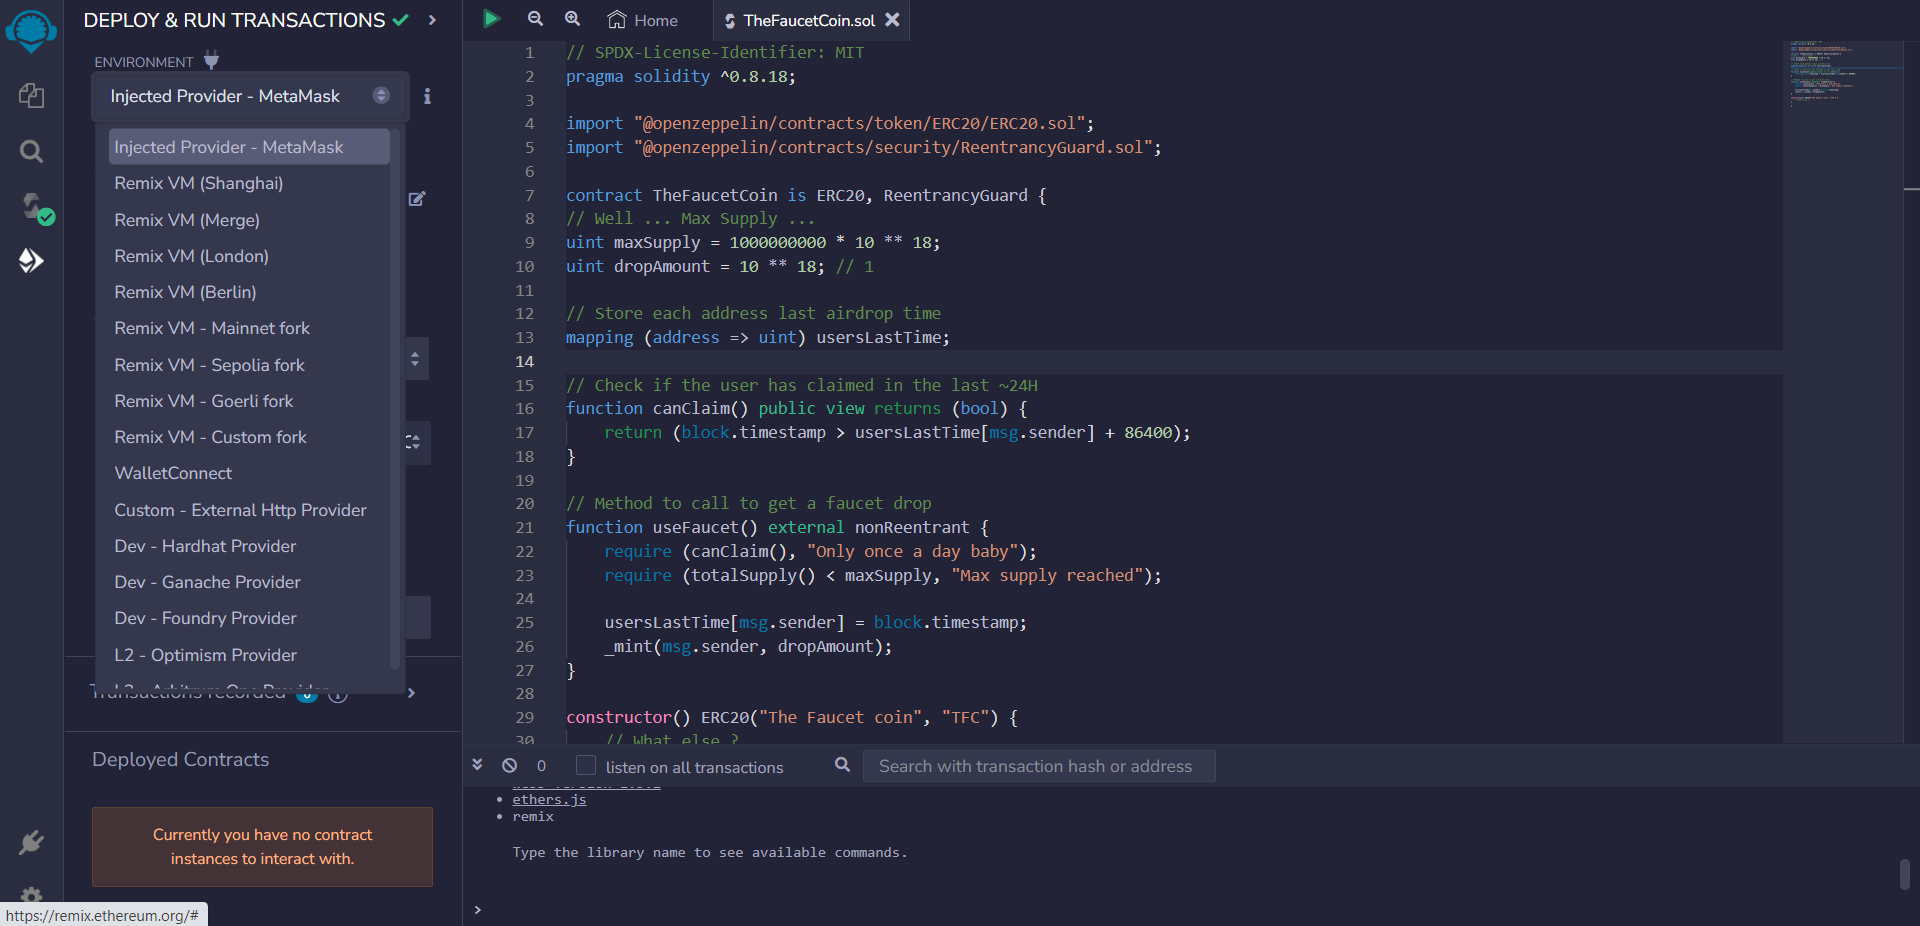
I didn’t bother and typed this code directly into a new file in Remix, compiled it and deployed it on Gobi and Horizen EON using MetaMask as the deployment environment. Right click on the source file and select Flatten and validate and publish the contract on the 2 blockchains testnet (Gobi) and mainnet (Horizen EON).
The dApp
Another essential component of developing a dApp on Horizen EON is the user interface.
We’re going to build the dApp step by step so that we don’t mess everything up.
Minimal application and development server
We create a new thefaucetcoin directory, and inside it, a new ReactJS app. I’m not using create-wagmi, so we can add the elements ourselves one at a time, just to be sure.
Then add wagmi and viem (and typescript to avoid conflicts with an old react-scripts dependency, -force or -legacy-peer-deps will also work. I’d better stop using create-react-app …):
npm i wagmi viem typescriptEmpty the index.css and app.css files, and you’ll be left with a stripped-down App.js file:
import './App.css';
function App() {
return (
<div className="App">
</div>
);
}
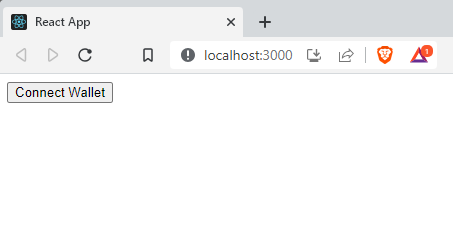
export default App;We start the development server with npm start to see that we get a blank page (all for this …).
Adding Gobi to wagmi’s chains
Currently, wagmi does not include Gobi and Horizen EON in its preconfigured chains. So we need to add a configuration file for each of them.
Let’s see how to do this for Gobi. I created a utils subdirectory in src and created a gobi.ts file with the following contents
import { Chain } from 'wagmi'

export const gobi = {
  id: 1_663,
  name: 'Gobi',
  network: 'gobi',
  nativeCurrency: {
    decimals: 18,
    name: 'ZEN',
    symbol: 'ZEN',
  },
  rpcUrls: {
    public: { http: ['https://gobi-testnet.horizenlabs.io/ethv1'] },
    default: { http: ['https://gobi-testnet.horizenlabs.io/ethv1'] },
  },
  blockExplorers: {
    etherscan: { name: 'Gobi Explorer', url: 'https://gobi-explorer.horizen.io/' },
    default: { name: 'Gobi Explorer', url: 'https://gobi-explorer.horizen.io/' },
  },
  contracts: {
  },
  testnet: true,
} as const satisfies Chain
We import it as a header for the App.js file :
import { gobi } from './utils/gobi.ts'Configuring wagmi
We can then move on to the minimal configuration of wagmi by calling configureChains and createConfig and wrapping our app in a WagmiConfig tag :
import { WagmiConfig, createConfig, configureChains } from 'wagmi'
import { publicProvider } from 'wagmi/providers/public'
import { gobi } from './utils/gobi.ts'
import './App.css'

function App() {
  const { publicClient } = configureChains(
    [gobi],
    [publicProvider()],
  )

  const config = createConfig({
    autoConnect: true,
    publicClient,
  })

  return (
    <WagmiConfig config={config}>
      <div className="App">
      </div>
    </WagmiConfig>
  );
}

export default App;
Wallet connection
At this stage, we still have a blank page, which is frustrating. Let’s add a Profile component to manage the connection.
function Profile() {
  const { address, isConnected } = useAccount()
  const { connect } = useConnect({
    connector: new InjectedConnector(),
  })

  if (isConnected) {
    return <div>
        Connected to {address}
      </div>
  }

  return <button onClick={() => connect()}>Connect Wallet</button>
}
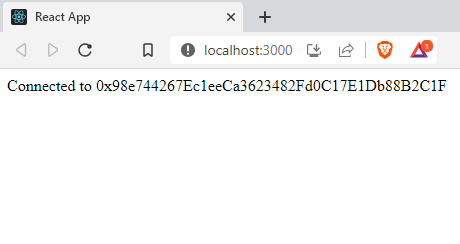
Wagmi works with hooks. Here we use useAccount, which reflects the connection status and the connected address, if any, and useConnect, which lets you interact with a connector, in this case the one built into the browser (metamask/Brave wallet/Rabby/…).
These elements need to be loaded before they can be used, so we add the :
import { useAccount, useConnect } from 'wagmi'
import { InjectedConnector } from 'wagmi/connectors/injected'
Finally, we insert the component into the body of the App :
    <WagmiConfig config={config}>
      <div className="App">
        <Profile />
      </div>
    </WagmiConfig>
And our page is not empty anymore:
We want to claim!
Great! Now that we know how to connect, let’s create the Claim component that will allow us to use the TFC faucet.
We’ll start by retrieving the ABI of the deployed smart contract. The ABI is generated when the contract is compiled. I’ve placed it in the utils directory in a file called tfcAbi.json. It now needs to be imported into the app.
import tfcContractAbi from './utils/tfcAbi.json'Then, we need to retrieve the address of our contract for future use.
const tfcContractAddress = "0xd38D3BFcc7c29765F5c7569DFB931d851E3c7844"Finally, we add some additional imports that will be needed for this new component.
import { useState } from 'react';
import { useContractRead } from 'wagmi'
import { useContractWrite, usePrepareContractWrite } from 'wagmi'
Okay, let’s look at the Claim component code:
function Claim(props) {
const [walletCanClaim, setCanClaim] = useState(false);
useContractRead({
address: tfcContractAddress,
abi: tfcContractAbi,
functionName: 'canClaim',
account: props.address,
onSuccess(data) {
setCanClaim(data);
},
})
const { config } = usePrepareContractWrite({
address: tfcContractAddress,
abi: tfcContractAbi,
functionName: 'useFaucet',
})
const { data, isLoading, isSuccess, write } = useContractWrite(config)
return <div>
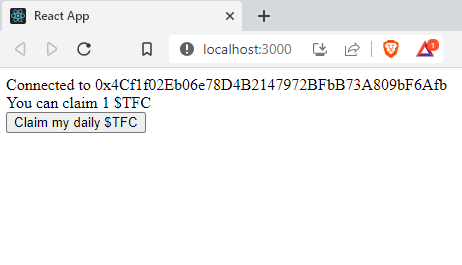
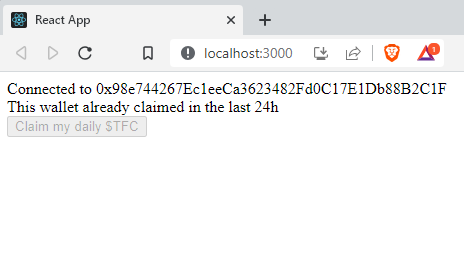
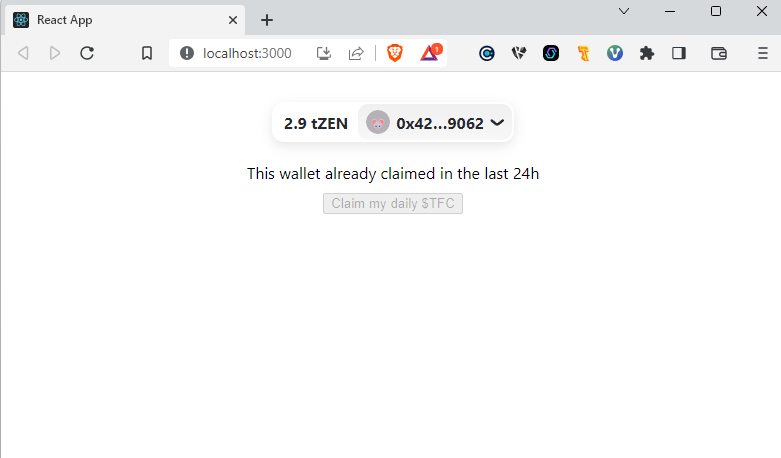
<div>{ walletCanClaim ? "You can claim 1 $TFC" : "This wallet already claimed in the last 24h" }</div>
<div>
<button disabled={!walletCanClaim} onClick={() => write?.()}>
Claim my daily $TFC
</button>
</div>
{isLoading && <div>Check Wallet</div>}
{isSuccess && <div>Success ! <a href={"https://gobi-explorer.horizen.io/tx/" + data.hash}>Check Transaction</a></div>}
</div>
}We declare a walletCanClaim state variable with its setter setCanClaim.
Next, we call the contract’s canClaim function. We provide the contract address, its ABI and the function called. Take care to call with the connected address to avoid caching issues. Finally, if successful, we store the return value in the walletCanClaim variable.
Prepare to call the useFaucet function. And we’ve got everything we need to generate our component:
- Depending on the value of walletCanClaim, we display a message indicating the wallet’s eligibility for the daily drop.
- We generate the button that calls the useFaucet function, but depending on the value of walletCanClaim, we disable it or not.
- This is followed by 2 informational messages that are displayed when waiting for a user interaction in the wallet, and the success message that allows the transaction to be displayed in the explorer.
The Claim component is defined. It can be loaded into Profile:
  if (isConnected) {
    return <div>
        Connected to {address}
        <Claim address={address} />
      </div>
  }
We’ve seen how to develop a dApp on Horizen EON, and as it stands, the dApp is functional. However, it still has a number of potential problems and improvements that we’ll address in the remainder of this article.
Select the right network
A network selector is obviously handy, if not essential, to ensure that requests don’t go to networks other than Gobi or Horizen EON!
We’ll place this element in the Profile component to block the app if you’re on a different network.
The selector will use the following 2 hooks: useNetwork and useSwitchNetwork. We import them from wagmi:
import { useNetwork, useSwitchNetwork } from 'wagmi'The Profile component can then be modified:
function Profile() {
const { address, isConnected } = useAccount()
const { connect } = useConnect({
connector: new InjectedConnector(),
})
const { chain } = useNetwork()
const { switchNetwork } = useSwitchNetwork(gobi.id);
if (isConnected) {
if (chain.id === gobi.id) {
return <div>
Connected to {address}
<Claim address={address} />
</div>
}
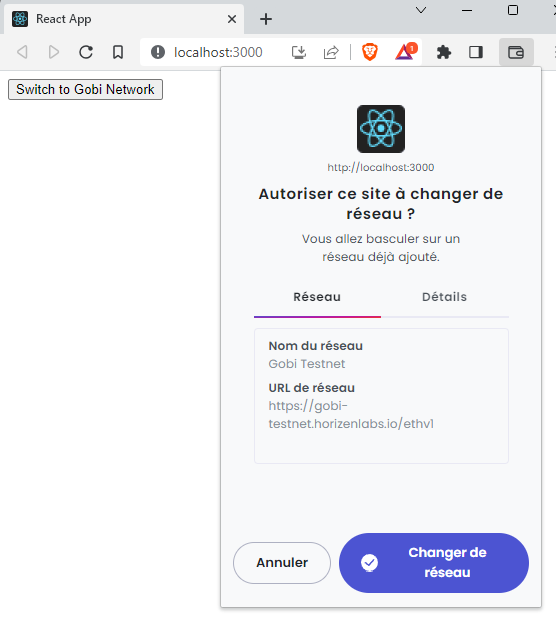
return <button onClick={() => switchNetwork(gobi.id)}>Switch to Gobi Network</button>
}
return <button onClick={() => connect()}>Connect Wallet</button>
}That’s about it. Once connected, if you’re not on the right network, a button will suggest you switch. And when you leave the network, the dApp interface disappears and the switch button reappears.
Using an RPC provider: Ankr
This tutorial also explores tools for dApp development on Horizen EON. We’ll use Ankr for the RPC interface to the blockchain.
Why not use public RPC interfaces? Because if a dApp generates too much traffic on public RPCs, there’s a risk that it will quickly find itself limited in the number of requests it can accept, degrading the user experience or even rendering the dApp unusable.
By the way, providers like Ankr, Alchemy, ChainStack, Blockstream, etc. offer additional functionality and are not limited to just providing RPC interfaces, especially for handling NFTs or other rewards.
We go to the Ankr website to create a free account. This will allow you to get a personalized address for the interface and track the requests you send to it.
– > https://www.ankr.com/rpc/horizen/
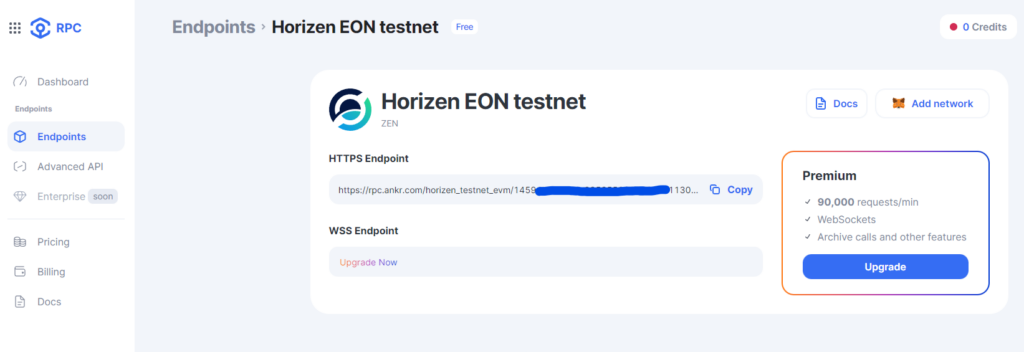
Once we have our customized endpoint (we can use Ankr’s public endpoint for testing purposes), we adapt the client declaration in App().
  const { publicClient } = configureChains(
    [gobi],
    [
      jsonRpcProvider({
        rpc: () => {
          return {
            http: "https://rpc.ankr.com/horizen_testnet_evm/14594...bbe3"
          };
        },
      }),
    ],
  )
Note: It’s perfectly possible to add publicProvider(), which can be used as a backup solution « just in case ».
In practice, you can’t tell the difference… It’s frustrating, but it’s a good thing.
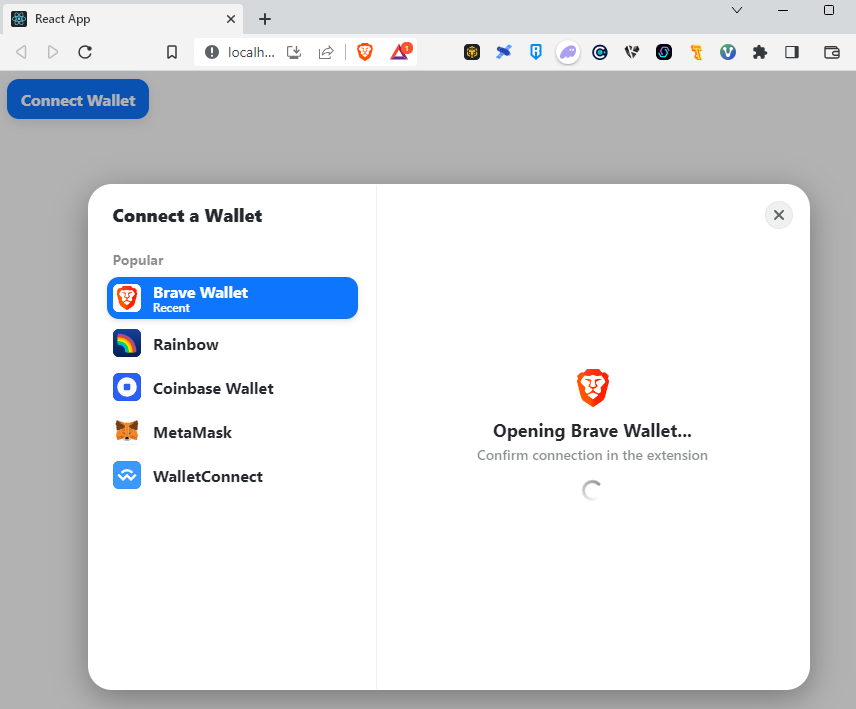
Multiplying wallets: RainbowKit
To finally create something visible and improve the user interface, we’ll tackle the connector part of wagmi and use RainbowKit, which is often used on dApps as an alternative to Web3Modal or other multiwallet solutions.
We’ll start by adding the code library needed for the project (adding typescript for the same reason as above, create-react-app is no longer maintained, so I’ll have to update):
npm install @rainbow-me/rainbowkit typescriptWe need to load 2 imports for the appearance and functionality of the interface, and one more for the connection button and its interface:
import '@rainbow-me/rainbowkit/styles.css'
import { getDefaultWallets, RainbowKitProvider } from '@rainbow-me/rainbowkit'
import { ConnectButton } from '@rainbow-me/rainbowkit';RainbowKit, like Web3Modal, uses WalletConnect. So you’ll need to create an account and a project on cloud.walletconnect.com to define a project name and ID, which we’ll use in the configuration. All this is quick and free.
Now let’s edit our App():
function App() {
  const { chains, publicClient } = configureChains(
    [gobi],
    [
      jsonRpcProvider({
        rpc: () => {
          return {
            http: "https://rpc.ankr.com/horizen_testnet_evm/1459...7bbe3"
          };
        },
      }),
      publicProvider(),
    ],
  )

  const { connectors } = getDefaultWallets({
    appName: 'TheFaucetCoin',
    projectId: '896cf........7ae4',
    chains
  });

  const config = createConfig({
    autoConnect: true,
    connectors,
    publicClient,
  })

  return (
    <WagmiConfig config={config}>
      <RainbowKitProvider chains={chains}>
        <div className="App">
          <Profile />
        </div>
      </RainbowKitProvider>
    </WagmiConfig>
  );
}
- Line 2, we retrieve chains in return for the call to configureChains, which we will use later.
- Lines 17 and 18, we initialize RainbowKit’s connectors with the name and ID retrieved from our project declared on cloud.walletconnect.com earlier, as well as the chains variable retrieved just above.
- Line 24, adding connectors to wagmi config
- Lines 30 and 34, we wrap our app in the RainbowKitProvider component.
Now we’re ready to replace our ugly connection button. Back to the Profile component:
function Profile() {
  const { address, isConnected } = useAccount()

  const { chain } = useNetwork()
  const { switchNetwork } = useSwitchNetwork(gobi.id);

  if (isConnected) {
    if (chain.id === gobi.id) {
      return <div>
        Connected to {address}
        <Claim address={address} />
      </div>
    }

    return <button onClick={() => switchNetwork(gobi.id)}>Switch to Gobi Network</button>
  }

  return <ConnectButton />
}
- Line 3, the useConnect call, disappears. This is now RainbowKit’s job.
- Line 18, the previous Connect button is removed and RainbowKit’s is added.
Bonus: RainbowKit can handle network switching all by itself!
Configuration constants
To make the code easier to maintain and port, we’re going to remove all the configuration constants, project name, walletconnect id, rpc, etc. from the code.
To do this, we’ll create an .env file that contains the variables we want to « port » from the application code. Variables can have any name, but it must start with REACT_APP_ or it will be ignored.
REACT_APP_TFC_CONTRACT_ADDRESS = "0xd38D3BFcc7c29765F5c7569DFB931d851E3c7844"
REACT_APP_BLOCK_EXPLORER_BASE_URL = "https://gobi-explorer.horizen.io/tx/"
REACT_APP_RPC_HTTP_URL = "https://rpc.ankr.com/horizen_testnet_evm/1459...7bbe3"
REACT_APP_WC_PROJECT_NAME = "TheFaucetCoin"
REACT_APP_WC_PROJECT_ID = "896c...7ae4"
They can then be used in the code using process.env.VARIABLE_NAME :
const tfcContractAddress = process.env.REACT_APP_TFC_CONTRACT_ADDRESS
...
<a href={process.env.REACT_APP_BLOCK_EXPLORER_BASE_URL + data.hash}>Check Transaction</a>
...
  const { chains, publicClient } = configureChains(
    [gobi],
    [
      jsonRpcProvider({
        rpc: () => {
          return {
            http: process.env.REACT_APP_RPC_HTTP_URL
          };
        },
      }),
      publicProvider(),
    ],
  )
...
  const { connectors } = getDefaultWallets({
    appName: process.env.REACT_APP_WC_PROJECT_NAME,
    projectId: process.env.REACT_APP_WC_PROJECT_ID,
    chains
  });
  ...
Nota Bene : For the changes in the .env file to take effect, the development server must be restarted.
Conclusion
That’s it for this « Developing a dApp on Horizen EON » tutorial. If you had any trouble following it, you can contact me on twitter (uh X, sorry) and on the Horizen Discord!
Llinks
- Horizen EON portal : https://eon.horizen.io/
- Wagmi : https://wagmi.sh/
- Ankr : https://www.ankr.com/
- RainbowKit : https://www.rainbowkit.com/
- More details on environment variables : Adding custom environment variables
- The Faucet Coin : https://thefaucetcoin.mescryptos.fr/
- More Horizen content on « Mes Cryptos » : https://mescryptos.fr/tag/horizen/